Insulate Your Heating Pipes – A Simple Step Toward a More Energy-Efficient Home

Insulate Your Heating Pipes – A Simple Step Toward a More Energy-Efficient Home
When people think about improving their home’s energy efficiency, they often picture new windows, attic insulation, or a high-efficiency furnace. But one of the simplest and most affordable upgrades you can make is insulating your heating pipes. It doesn’t require professional skills or a big budget, yet it can noticeably reduce your energy bills and make your home more comfortable. Here’s why and how you should do it.
Why Insulating Heating Pipes Matters
As hot water travels from your boiler or water heater to your radiators, baseboards, or faucets, it loses heat along the way. Uninsulated pipes can release a surprising amount of warmth—especially in basements, crawl spaces, and other unheated areas. That means you’re paying to heat spaces you don’t actually use.
By insulating your pipes, you can cut heat loss by up to 80%. This leads to lower energy consumption, faster delivery of hot water, and more consistent indoor temperatures. It also helps prevent condensation and corrosion on the pipes, extending their lifespan.
A Small Investment with Big Returns
Pipe insulation is one of the most cost-effective energy upgrades you can make. The materials are inexpensive—often just a few dollars per length of pipe—and the job can be done in an afternoon. Many homeowners recover the cost within a single heating season through lower utility bills.
If you live in an older home, where pipes are often uninsulated or covered with deteriorated material, the savings can be even greater. It’s an ideal first step if you want to make your home more energy-efficient without taking on a major renovation.
Læs også:
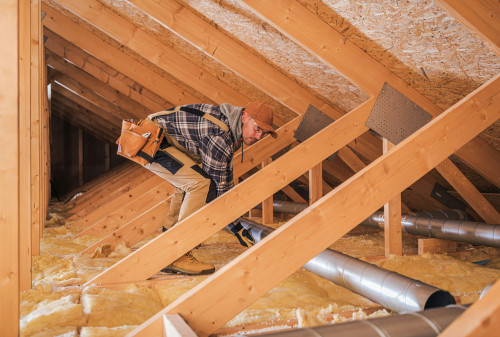


How to Do It – Step by Step
- Locate all visible heating pipes – especially in basements, utility rooms, attics, and crawl spaces.
- Measure the pipe diameter – this ensures you buy insulation that fits snugly.
- Purchase pipe insulation sleeves – foam or fiberglass types are widely available at hardware stores.
- Cut and install – most sleeves have a slit along one side so you can easily open and wrap them around the pipe.
- Seal the joints – use tape or plastic fasteners to close gaps and prevent heat from escaping.
- Check valves and bends – use flexible insulation or small custom-cut pieces to cover tricky spots.
You don’t need special tools, and most homeowners can handle the job themselves. Just be sure not to cover valves, gauges, or other components that need to remain accessible.
Choosing the Right Insulation
There are several types of pipe insulation, and the best choice depends on where your pipes are located:
- Foam insulation (polyethylene or rubber) – lightweight, inexpensive, and easy to install. Great for indoor use.
- Fiberglass insulation – handles higher temperatures and is ideal for boiler rooms or mechanical spaces.
- Rubber or elastomeric insulation – flexible and moisture-resistant, perfect for areas prone to condensation.
Check your local energy code or utility recommendations for minimum insulation thickness. As a general rule, the insulation should be at least as thick as the pipe’s diameter.
Maintenance and Inspection
Pipe insulation lasts for many years, but it’s worth checking periodically for damage. Moisture, pests, or wear and tear can reduce its effectiveness. Replace any damaged sections and make sure seams remain tightly sealed.
If you’re having other work done—such as replacing a water heater or upgrading your heating system—ask your contractor to inspect and improve the pipe insulation at the same time.
A Simple Step Toward a Greener Home
Insulating your heating pipes is a perfect example of how small home improvements can make a big difference. You’ll save energy, lower your carbon footprint, and enjoy a more comfortable living space—all for a modest investment of time and money.
It’s a weekend project that pays off for years to come—and it might just inspire you to take the next step toward a more energy-efficient home.
Læs også: